The Xamarin platform consists of a number of elements that allow you to develop applications for iOS and Android:

  • C# language – Allows you to use a familiar syntax and sophisticated features like Generics, LINQ and the Parallel Task Library.
  • Mono .NET framework – Provides a cross-platform implementation of the extensive features in Microsoft’s .NET framework.
  • Compiler – Depending on the platform, produces a native app (eg. iOS) or an integrated .NET application and runtime (eg.Android). The compiler also performs many optimizations for mobile deployment such as linking away un-used code.
  • IDE tools – The Visual Studio on Mac and Windows allows you to create, build, and deploy Xamarin projects.

In addition, because the underlying language is C# with the .NET framework, projects can be structured to share code that can also be deployed to Windows Phone.

Under the Hood

Although Xamarin allows you to write apps in C#, and share the same code across multiple platforms, the actual implementation on each system is very different.

Compilation

The C# source makes its way into a native app in very different ways on each platform:

  • iOS – C# is ahead-of-time (AOT) compiled to ARM assembly language. The .NET framework is included, with unused classes being stripped out during linking to reduce the application size. Apple does not allow runtime code generation on iOS, so some language features are not available (see Xamarin.iOS Limitations ).
  • Android – C# is compiled to IL and packaged with MonoVM + JIT’ing. Unused classes in the framework are stripped out during linking. The application runs side-by-side with Java/ART (Android runtime) and interacts with the native types via JNI (seeXamarin.Android Limitations ).
  • Windows – C# is compiled to IL and executed by the built-in runtime, and does not require Xamarin tools. Designing Windows applications following Xamarin’s guidance makes it simpler to re-use the code on iOS and Android. Note that the Universal Windows Platform also has a .NET Native option which behaves similarly to Xamarin.iOS' AOT compilation.

The linker documentation for Xamarin.iOS and Xamarin.Android provides more information about this part of the compilation process.

Runtime 'compilation' – generating code dynamically with System.Reflection.Emit – should be avoided.

Apple’s kernel prevents dynamic code generation on iOS devices, therefore emitting code on-the-fly will not work in Xamarin.iOS.Likewise, the Dynamic Language Runtime features cannot be used with Xamarin tools.

Some reflection features do work (eg. MonoTouch.Dialog uses it for the Reflection API), just not code generation.

Platform SDK Access

Xamarin makes the features provided by the platform-specific SDK easily accessible with familiar C# syntax:

  • iOS – Xamarin.iOS exposes Apple’s CocoaTouch SDK frameworks as namespaces that you can reference from C#. For example the UIKit framework that contains all the user interface controls can be included with a simple using UIKit; statement.
  • Android – Xamarin.Android exposes Google’s Android SDK as namespaces, so you can reference any part of the supported SDK with a using statement, such as using Android.Views; to access the user interface controls.
  • Windows – Windows apps are built using Visual Studio on Windows. Project types include Windows Forms, WPF, WinRT, and the Universal Windows Platform (UWP).

Seamless Integration for Developers

The beauty of Xamarin is that despite the differences under the hood, Xamarin.iOS and Xamarin.Android (coupled with Microsoft’s Windows SDKs) offer a seamless experience for writing C# code that can be re-used across all three platforms.

Business logic, database usage, network access, and other common functions can be written once and re-used on each platform, providing a foundation for platform-specific user interfaces that look and perform as native applications.

Integrated Development Environment (IDE) Availability

Xamarin development can be done in Visual Studio on either Mac or Windows. The IDE you choose will be determined by the platforms you wish to target.

Because Windows apps can only be developed on Windows, to build for iOS, Android, and Windows requires Visual Studio for Windows. However it's possible to share projects and files between Windows and Mac computers, so iOS and Android apps can be built on a Mac and shared code could later be added to a Windows project.

The development requirements for each platform are discussed in more detail in the Requirement guide.

iOS

Developing iOS applications requires a Mac computer, running macOS. You can also use Visual Studio to write and deploy iOS applications with Xamarin in Visual Studio. However, a Mac is still needed for build and licensing purposes.

Apple’s Xcode IDE must be installed to provide the compiler and simulator for testing. You can test on your own devices for free, but to build applications for distribution (eg. the App Store) you must join Apple’s Developer Program ($99 USD per year). Each time you submit or update an application, it must be reviewed and approved by Apple before it is made available for customers to download.

Code is written with the Visual Studio IDE and screen layouts can be built programmatically or edited with Xamarin's iOS Designer in either IDE.

Refer to the Xamarin.iOS Installation Guide for detailed instructions on getting set up.

Android

Android application development requires the Java and Android SDKs to be installed. These provide the compiler, emulator and other tools required for building, deployment and testing. Java, Google’s Android SDK and Xamarin’s tools can all be installed and run on Windows and macOS. The following configurations are recommended:

  • Windows 10 with Visual Studio 2019
  • macOS Mojave (10.11+) with Visual Studio 2019 for Mac

Xamarin provides a unified installer that will configure your system with the pre-requisite Java, Android and Xamarin tools (including a visual designer for screen layouts). Refer to the Xamarin.Android Installation Guide for detailed instructions.

You can build and test applications on a real device without any license from Google, however to distribute your application through a store (such as Google Play, Amazon or Barnes & Noble) a registration fee may be payable to the operator. Google Play will publish your app instantly, while the other stores have an approval process similar to Apple’s.

Windows

Windows apps (WinForms, WPF, or UWP) are built with Visual Studio. They do not use Xamarin directly. However, C# code can be shared across Windows, iOS and Android. Visit Microsoft’s Dev Center to learn about the tools required for Windows development.

Creating the User Interface (UI)

A key benefit of using Xamarin is that the application user interface uses native controls on each platform, creating apps that are indistinguishable from an application written in Objective-C or Java (for iOS and Android respectively).

When building screens in your app, you can either lay out the controls in code or create complete screens using the design tools available for each platform.

Create Controls Programmatically

Each platform allows user interface controls to be added to a screen using code. This can be very time-consuming as it can be difficult to visualize the finished design when hard-coding pixel coordinates for control positions and sizes.

Programmatically creating controls does have benefits though, particularly on iOS for building views that resize or render differently across the iPhone and iPad screen sizes.

Visual Designer

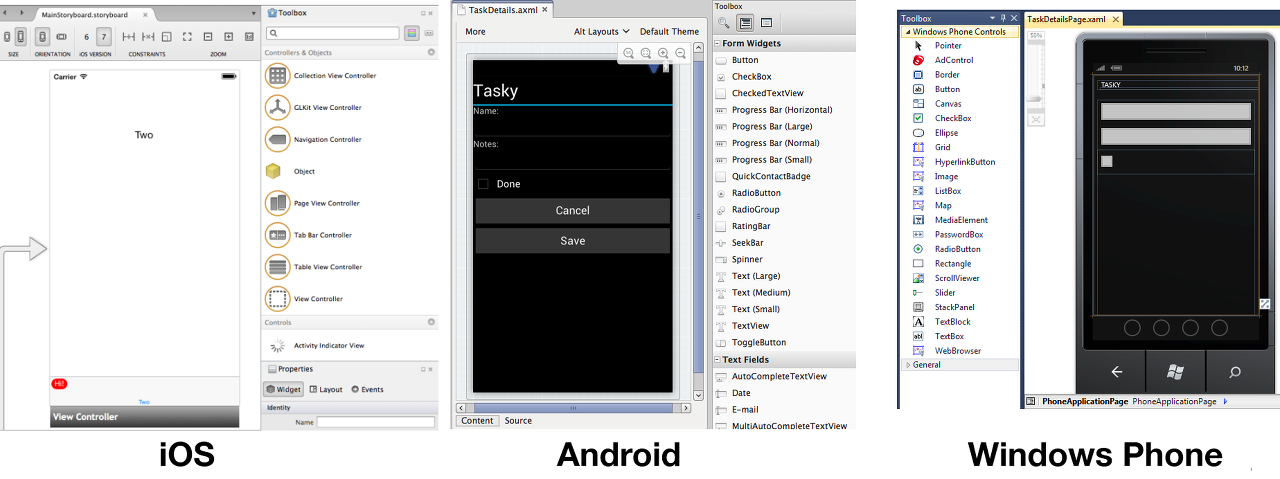
Each platform has a different method for visually laying out screens:

  • iOS – Xamarin's iOS Designer facilitates building Views using drag-and-drop functionality and property fields. Collectively these Views make up a Storyboard, and can be accessed in the .Storyboard file that is included in your project.
  • Android – Xamarin provides an Android drag-and-drop UI designer for Visual Studio. Android screen layouts are saved as .AXML files when using Xamarin tools.
  • Windows – Microsoft provides a drag-and-drop UI designer in Visual Studio and Blend. The screen layouts are stored as .XAML files.

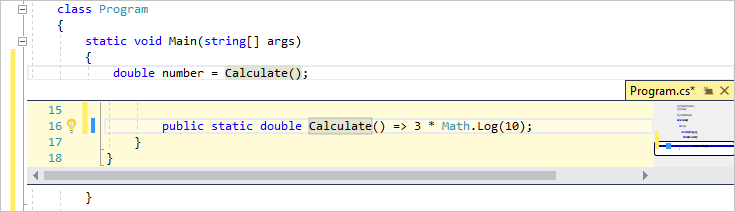
These screenshots show the visual screen designers available on each platform:

In all cases the elements that you create visually can be referenced in your code.

User Interface Considerations

A key benefit of using Xamarin to build cross platform applications is that they can take advantage of native UI toolkits to present a familiar interface to the user. The UI will also perform as fast as any other native application.

Some UI metaphors work across multiple platforms (for example, all three platforms use a similar scrolling-list control) but in order for your application to ‘feel’ right the UI should take advantage of platform-specific user interface elements when appropriate.Examples of platform-specific UI metaphors include:

  • iOS – hierarchical navigation with soft back button, tabs on the bottom of the screen.
  • Android – hardware/system-software back button, action menu, tabs on the top of the screen.
  • Windows – Windows apps can run on desktops, tablets (such as Microsoft Surface) and phones. Windows 10 devices may have hardware back button and live tiles, for example.

It is recommended that you read the design guidelines relevant to the platforms you are targeting:

Library and Code Re-Use

The Xamarin platform allows re-use of existing C# code across all platforms as well as the integration of libraries written natively for each platform.

C# Source and Libraries

Because Xamarin products use C# and the .NET framework, lots of existing source code (both open source and in-house projects) can be re-used in Xamarin.iOS or Xamarin.Android projects. Often the source can simply be added to a Xamarin solution and it will work immediately. If an unsupported .NET framework feature has been used, some tweaks may be required.

Examples of C# source that can be used in Xamarin.iOS or Xamarin.Android include: SQLite-NET, NewtonSoft.JSON and SharpZipLib.

Objective-C Bindings + Binding Projects

Xamarin provides a tool called btouch that helps create bindings that allow Objective-C libraries to be used in Xamarin.iOS projects.Refer to the Binding Objective-C Types documentation for details on how this is done.

Examples of Objective-C libraries that can be used in Xamarin.iOS include: RedLaser barcode scanning, Google Analytics and PayPal integration. Open-source Xamarin.iOS bindings are available on github.

.jar Bindings + Binding Projects

Xamarin supports using existing Java libraries in Xamarin.Android. Refer to the Binding a Java Library documentation for details on how to use a .JAR file from Xamarin.Android.

Open-source Xamarin.Android bindings are available on github.

C via PInvoke

"Platform Invoke" technology (P/Invoke) allows managed code (C#) to call methods in native libraries as well as support for native libraries to call back into managed code.

For example, the SQLite-NET library uses statements like this:

C#복사

[DllImport("sqlite3", EntryPoint = "sqlite3_open", CallingConvention=CallingConvention.Cdecl)] public static extern Result Open (string filename, out IntPtr db);

This binds to the native C-language SQLite implementation in iOS and Android. Developers familiar with an existing C API can construct a set of C# classes to map to the native API and utilize the existing platform code. There is documentation for linking native libraries in Xamarin.iOS, similar principles apply to Xamarin.Android.

C++ via CppSharp

Miguel explains CXXI (now called CppSharp) on his blog. An alternative to binding to a C++ library directly is to create a C wrapper and bind to that via P/Invoke.

The Visual Studio integrated development environment is a creative launching pad that you can use to edit, debug, and build code, and then publish an app. An integrated development environment (IDE) is a feature-rich program that can be used for many aspects of software development. Over and above the standard editor and debugger that most IDEs provide, Visual Studio includes compilers, code completion tools, graphical designers, and many more features to ease the software development process.


This image shows Visual Studio with an open project and several key tool windows you'll likely use:

  • Solution Explorer (top right) lets you view, navigate, and manage your code files. Solution Explorer can help organize your code by grouping the files into solutions and projects.

  • The editor window (center), where you'll likely spend a majority of your time, displays file contents. This is where you can edit code or design a user interface such as a window with buttons and text boxes.

Editions

Visual Studio is available for Windows and Mac. Visual Studio for Mac has many of the same features as Visual Studio 2019, and is optimized for developing cross-platform and mobile apps. This article focuses on the Windows version of Visual Studio 2019.

There are three editions of Visual Studio 2019: Community, Professional, and Enterprise. See Compare Visual Studio IDEs to learn about which features are supported in each edition.

Some of the popular features in Visual Studio that help you to be more productive as you develop software include:

  • Squiggles and Quick Actions

    Squiggles are wavy underlines that alert you to errors or potential problems in your code as you type. These visual clues enable you to fix problems immediately without waiting for the error to be discovered during build or when you run the program. If you hover over a squiggle, you see additional information about the error. A light bulb may also appear in the left margin with actions, known as Quick Actions, to fix the error.

  • Refactoring

    Refactoring includes operations such as intelligent renaming of variables, extracting one or more lines of code into a new method, changing the order of method parameters, and more.

  • IntelliSense

    IntelliSense is a term for a set of features that displays information about your code directly in the editor and, in some cases, write small bits of code for you. It's like having basic documentation inline in the editor, which saves you from having to look up type information elsewhere. IntelliSense features vary by language. For more information, see C# IntelliSense, Visual C++ IntelliSense, JavaScript IntelliSense, and Visual Basic IntelliSense. The following illustration shows how IntelliSense displays a member list for a type:

  • Search box

    Visual Studio can seem overwhelming at times with so many menus, options, and properties. The search box is a great way to rapidly find what you need in Visual Studio. When you start typing the name of something you're looking for, Visual Studio lists results that take you exactly where you need to go. If you need to add functionality to Visual Studio, for example to add support for an additional programming language, the search box provides results that open Visual Studio Installer to install a workload or individual component.


    Press Ctrl+Q as a shortcut to the search box.

  • Live Share

    Collaboratively edit and debug with others in real time, regardless of what your app type or programming language. You can instantly and securely share your project and, as needed, debugging sessions, terminal instances, localhost web apps, voice calls, and more.

  • Call Hierarchy

    The Call Hierarchy window shows the methods that call a selected method. This can be useful information when you're thinking about changing or removing the method, or when you're trying to track down a bug.

  • CodeLens

    CodeLens helps you find references to your code, changes to your code, linked bugs, work items, code reviews, and unit tests, all without leaving the editor.

  • Go To Definition

    The Go To Definition feature takes you directly to the location where a function or type is defined.

  • Peek Definition

    The Peek Definition window shows the definition of a method or type without actually opening a separate file.

Install the Visual Studio IDE

In this section, you'll create a simple project to try out some of the things you can do with Visual Studio. You'll use IntelliSense as a coding aid, debug an app to see the value of a variable during the program's execution, and change the color theme.

To get started, download Visual Studio and install it on your system. The modular installer enables you to choose and install workloads, which are groups of features needed for the programming language or platform you prefer. To follow the steps for creating a program, be sure to select the .NET Core cross-platform development workload during installation.

When you open Visual Studio for the first time, you can optionally sign in using your Microsoft account or your work or school account.

Create a program

Let's dive in and create a simple program.

  1. Open Visual Studio.

    The start window appears with various options for cloning a repo, opening a recent project, or creating a brand new project.

  2. Choose Create a new project.

    The Create a new project window opens and shows several project templates. A template contains the basic files and settings needed for a given project type.

  3. To find the template we want, type or enter .net core console in the search box. The list of available templates is automatically filtered based on the keywords you entered. You can further filter the template results by choosing C# from the Languagedrop-down list. Select the Console App (.NET Core) template, and then choose Next.

  4. In the Configure your new project window, enter HelloWorld in the Project name box, optionally change the directory location for your project files, and then choose Create.

    Visual Studio creates the project. It's a simple "Hello World" application that calls the Console.WriteLine() method to display the literal string "Hello World!" in the console (program output) window.

    Shortly, you should see something like the following:

    The C# code for your application shows in the editor window, which takes up most of the space. Notice that the text is automatically colorized to indicate different parts of the code, such as keywords and types. In addition, small, vertical dashed lines in the code indicate which braces match one another, and line numbers help you locate code later. You can choose the small, boxed minus signs to collapse or expand blocks of code. This code outlining feature lets you hide code you don't need, helping to minimize onscreen clutter. The project files are listed on the right side in a window called Solution Explorer.

    There are other menus and tool windows available, but let's move on for now.

  5. Now, start the app. You can do this by choosing Start Without Debugging from the Debug menu on the menu bar. You can also press Ctrl+F5.

    Visual Studio builds the app, and a console window opens with the message Hello World!. You now have a running app!

  6. To close the console window, press any key on your keyboard.

  7. Let's add some additional code to the app. Add the following C# code before the line that says Console.WriteLine("Hello World!");:

    C#복사

    Console.WriteLine("\nWhat is your name?"); var name = Console.ReadLine();

    This code displays What is your name? in the console window, and then waits until the user enters some text followed by the Enter key.

  8. Change the line that says Console.WriteLine("Hello World!"); to the following code:

    C#복사

    Console.WriteLine($"\nHello {name}!");
  9. Run the app again by selecting Debug > Start Without Debugging or by pressing Ctrl+F5.

    Visual Studio rebuilds the app, and a console window opens and prompts you for your name.

  10. Enter your name in the console window and press Enter.

  11. Press any key to close the console window and stop the running program.

Use refactoring and IntelliSense

Let's look at a couple of the ways that refactoring and IntelliSense can help you code more efficiently.

First, let's rename the name variable:

  1. Double-click the name variable to select it.

  2. Type in the new name for the variable, username.

    Notice that a gray box appears around the variable, and a light bulb appears in the margin.

  1. Select the light bulb icon to show the available Quick Actions. Select Rename 'name' to 'username'.

    The variable is renamed across the project, which in our case is only two places.

  1. Now let's take a look at IntelliSense. Below the line that says Console.WriteLine($"\nHello {username}!");, type DateTime now = DateTime..

    A box displays the members of the DateTime class. In addition, the description of the currently selected member displays in a separate box.

  2. Select the member named Now, which is a property of the class, by double-clicking on it or pressing Tab. Complete the line of code by adding a semi-colon to the end.

  3. Below that, type in or paste the following lines of code:

    C#복사

    int dayOfYear = now.DayOfYear; Console.Write("Day of year: "); Console.WriteLine(dayOfYear);


    Console.Write is a little different to Console.WriteLine in that it doesn't add a line terminator after it prints. That means that the next piece of text that's sent to the output will print on the same line. You can hover over each of these methods in your code to see their description.

  4. Next, we'll use refactoring again to make the code a little more concise. Click on the variable now in the line DateTime now = DateTime.Now;.

    Notice that a little screwdriver icon appears in the margin on that line.

  5. Click the screwdriver icon to see what suggestions Visual Studio has available. In this case, it's showing the Inline temporary variable refactoring to remove a line of code without changing the overall behavior of the code:

  6. Click Inline temporary variable to refactor the code.

  1. Run the program again by pressing Ctrl+F5. The output looks something like this:

Debug code

When you write code, you need to run it and test it for bugs. Visual Studio's debugging system lets you step through code one statement at a time and inspect variables as you go. You can set breakpoints that stop execution of the code at a particular line. You can observe how the value of a variable changes as the code runs, and more.

Let's set a breakpoint to see the value of the username variable while the program is "in flight".

  1. Find the line of code that says Console.WriteLine($"\nHello {username}!");. To set a breakpoint on this line of code, that is, to make the program pause execution at this line, click in the far left margin of the editor. You can also click anywhere on the line of code and then press F9.

    A red circle appears in the far left margin, and the code is highlighted in red.

  2. Start debugging by selecting Debug > Start Debugging or by pressing F5.

  3. When the console window appears and asks for your name, type it in and press Enter.

    The focus returns to the Visual Studio code editor and the line of code with the breakpoint is highlighted in yellow. This signifies that it's the next line of code that the program will execute.

  4. Hover your mouse over the username variable to see its value. Alternatively, you can right-click on username and select Add Watch to add the variable to the Watch window, where you can also see its value.

  5. To let the program run to completion, press F5 again.

To get more details about debugging in Visual Studio, see Debugger feature tour.

Customize Visual Studio

You can personalize the Visual Studio user interface, including change the default color theme. To change to the Dark theme:

  1. On the menu bar, choose Tools > Options to open the Options dialog.
  1. On the Environment > General options page, change the Color theme selection to Dark, and then choose OK.

    The color theme for the entire IDE changes to Dark.

To learn about other ways you can personalize the IDE, see Personalize Visual Studio.

Next steps

Explore Visual Studio further by following along with one of these introductory articles:

If you're ready to dive into more coding, one of the following language-specific quickstarts is a good next step:

See also

피드백

+ Recent posts